
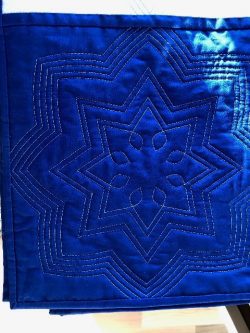
Ruler Work on a Domestic Sewing Machine – The Sampler Quilt
Dates: TBA
Times: 10am to 2.30pm (9.30am setup)
Focus: Ruler work Quilting
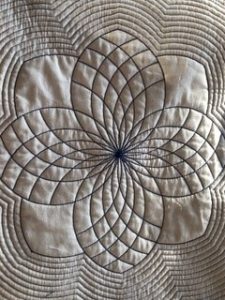
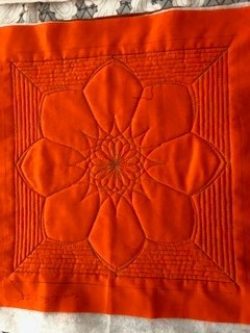
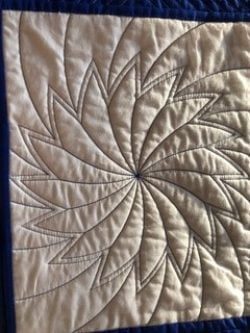
Develop your ruler quilting skills by completing a series of blocks that will use the quilt as you go method to complete a beautiful quilt. We will use blocks with patterns designed to develop your skills, and encourage your variations and adaptations. You will explore a range of effects possible when using Rulers and Templates designed for use with a domestic sewing machine. At the end of this course you will be able to confidently quilt your own tops with a variety of patterns. We will look at techniques, threads, material, needles and accessories. You can start quilting with this course, or follow up from the one-day introduction to expand your ruler quilting repertoire.
Using rulers can open up a world of possibilities in your quilting life – and the cost of the ruler foot and rulers is easily recouped in not paying for commercial quilting on one quilt!
Level of skill required for this workshop: Suitable for all levels of experience with quilting and beginners with free-motion and ruler work quilting.
A few notes about buying your material to use for this quilt!
- It may seem that you are buying a lot of material all at once, but you will be purchasing all the material you will need for the project before you start sewing – fabric for the top, backing and batting for a whole 60” x 60” quilt.
- This project makes a quilt that can be totally reversible, so you can use different colours for the top and the back to accentuate this feature.
- Canberra Sewing stocks an excellent range of colours in homespun materials which is very suitable for the project. I will be in the shop during the machine set-up time to assist if you want to purchase your fabric on the first day of the class.
- There are many types of batting on the market (wool, cotton, bamboo and blends) and all serve different purposes. Purchase a batting you prefer and can afford, avoiding full polyester battings. To show the patterns in my quilting, I have used Matilda’s Own wool/ poly which is also available at the shop.
Please bring the following with you to the workshop:
Materials:
- 6m fabric for the top and 6m backing (plain, simple batik or a diffuse print that will show off your quilting stitches)
- 3m batting
- Thread for quilting – 40 or 50 wt – we will discuss thread in class and the shop has a good range if you wish to leave this to purchase on the day. You will need approximately 950m of thread for the project.
Equipment:
- Ruler foot to suit your sewing machine, with any rulers you own. Can be purchased from Punch with Judy as a kit with the 12” arc ruler below.
- The 12” Arc Ruler sold with the ruler foot is a versatile and handy tool. I recommend it, even if it is the only ruler you purchase.
- The quilt in the shop was made using the Westalee Ruler Template Sample Set – if you have this set and have never used it, this is the course for you.
- Any other rulers you have designed for a domestic machine. A circle template, clamshell oval or variant, and any form of ruler will be useful in varying the patterns you can create.
- Non- slip tape or dots to secure your rulers and templates.
- Your machine and instruction manual, with your power cord and foot. Please look up how to lower your feed dogs.
- Flatbed table for your sewing machine – essential. You need to be able to place your hand flat with your fingers stretched out wide to the left of the needle on a flat sewing surface.
- Sew Slip or Supreme Slider mat
- Quilting safety pins, scissors, stitch ripper and needles – self threading are ideal
- Machine needles: topstitch 90, quilting 90 or those recommended by your machine manufacturer
- Measuring gadget for seam allowances if one is not included in your template set, sometimes called a Spacing Gauge. A version is available in most quilting shops.
- 4 bobbins to wind with the thread.
- A FriXion pen (not red) if your fabric is light coloured, or a chalk pencil if your fabric is dark.
- A quilting ruler – 12 inches long at least. This is to rule up guide lines on your block.
Optional Supplies:
- Quilting gloves that are a good, close fit. Check that rubber tips on the gloves don’t mark fabric.
- 8-point crosshair ruler – this will make drawing vertical and diagonals to divide your blocks into 8ths much easier and quicker.
Before the first workshop, cut:
A: 4 pieces, 10” x 10” of fabric
B: 4 pieces, 10” x 10” of backing fabric
C: 4 pieces, 10” x 10” of batting
Cut two 12” squares of material and one 12” square of batting to use when you are setting up and practicing to ensure your tension is correct and your stitch length is pleasing to you.
Bring these pieces to the workshop with you.
Tea and coffee are available at the shop. Please bring lunch and snacks with you. A café is located nearby.

